User Tools
first_run
Differences
This shows you the differences between two versions of the page.
| Both sides previous revisionPrevious revisionNext revision | Previous revision | ||
| first_run [2024/07/20 16:11] – tailspin | first_run [2024/10/09 06:32] (current) – tailspin | ||
|---|---|---|---|
| Line 8: | Line 8: | ||
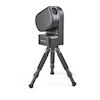
| In a limited sense, you can just plop the Seestar down, turn it on, and start capturing images—limited in the sense that it will only really work using Stargazing (DSO) mode. | In a limited sense, you can just plop the Seestar down, turn it on, and start capturing images—limited in the sense that it will only really work using Stargazing (DSO) mode. | ||
| - | The Seestar knows where it is (your mobile device told it), it knows what time it is (ditto), it has a built in compass so it knows where it’s pointed((Initially, | + | The Seestar knows where it is (your mobile device told it), it knows what time it is (ditto), it has a built in compass so it knows where it’s pointed((Initially, |
| In another case of YMMV, some Seestar owners will insist you have to carefully level the telescope and recalibrate the compass every session. If you want to find the Sun or Moon it does have to be level((You can help the scope find the Sun by slewing it in azimuth until the Sun shines through the crack between the telescope arm and the main body. That crack is also a handy aiming sight when you’re trying to shoot the Moon or something in Scenery Mode. Don’t look through the crack at the Sun!)). | In another case of YMMV, some Seestar owners will insist you have to carefully level the telescope and recalibrate the compass every session. If you want to find the Sun or Moon it does have to be level((You can help the scope find the Sun by slewing it in azimuth until the Sun shines through the crack between the telescope arm and the main body. That crack is also a handy aiming sight when you’re trying to shoot the Moon or something in Scenery Mode. Don’t look through the crack at the Sun!)). | ||
| Line 14: | Line 14: | ||
| {{ : | {{ : | ||
| - | You can fiddle with the tripod legs (or that leveler add-on thingy on page xx) to get the two circles to overlap. When you’re close, the circles will turn green. Try to get the number down to 0.5 or less. --- // | + | You can fiddle with the tripod legs (or that leveler add-on thingy on page xx) to get the two circles to overlap. When you’re close, the circles will turn green. Try to get the number down to 0.5 or less. |
first_run.1721517115.txt.gz · Last modified: 2024/07/20 16:11 by tailspin